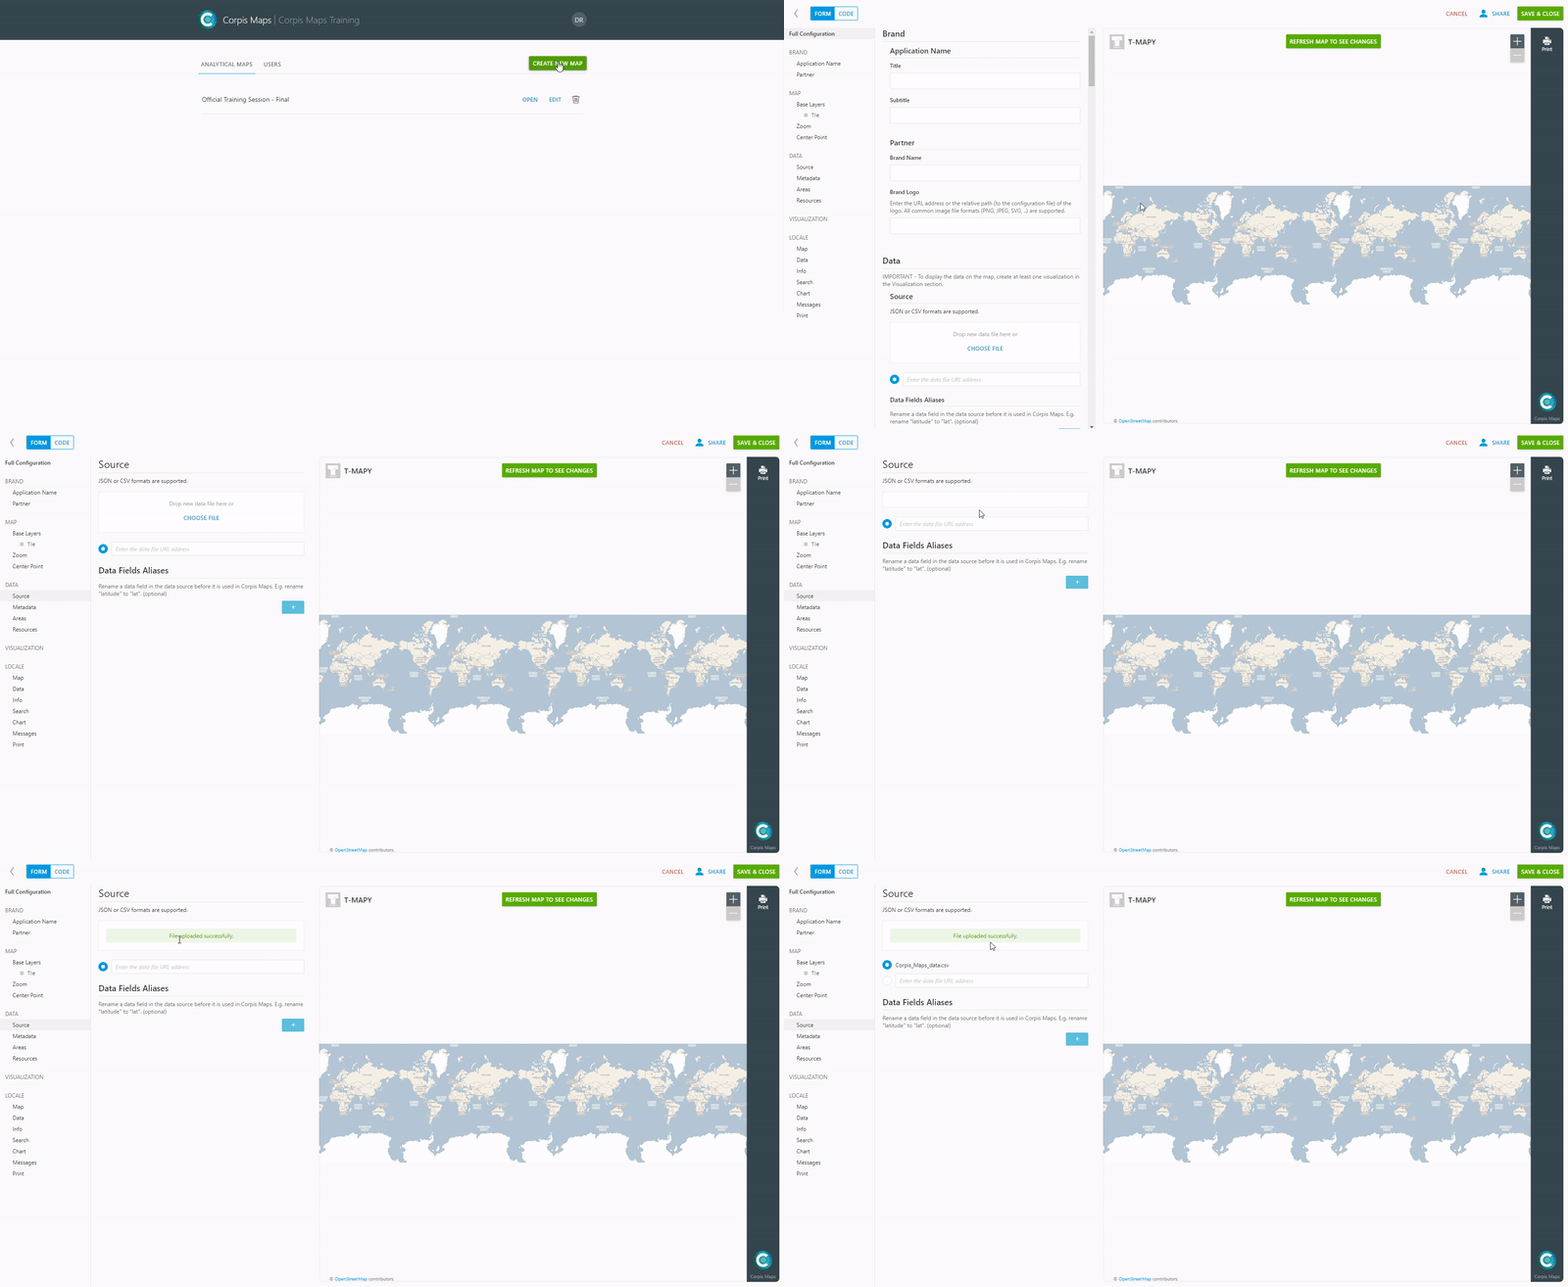
1. Add a Data Source
Click on “Create new map” in your Corpis Maps portal account. An empty configuration part of the map will open. In the “Source” section, upload the data file from which you will create the map. You can read how to properly prepare coordinates so that the data is displayed on the map in the article „Preparation of Coordinates for Managerial Maps“. You can search for the file on your computer via the “Choose file” option or use “Drag and Drop” to drag it to the defined area and the data will be uploaded. When uploading data, wait until the green message “File uploaded succesfully” appears. The second way to upload data is to copy a URL to a free line (https is required) if, for example, you have data stored on your server. Supported data formats are CSV (UTF-8) and JSON. One data file can be used for each map.

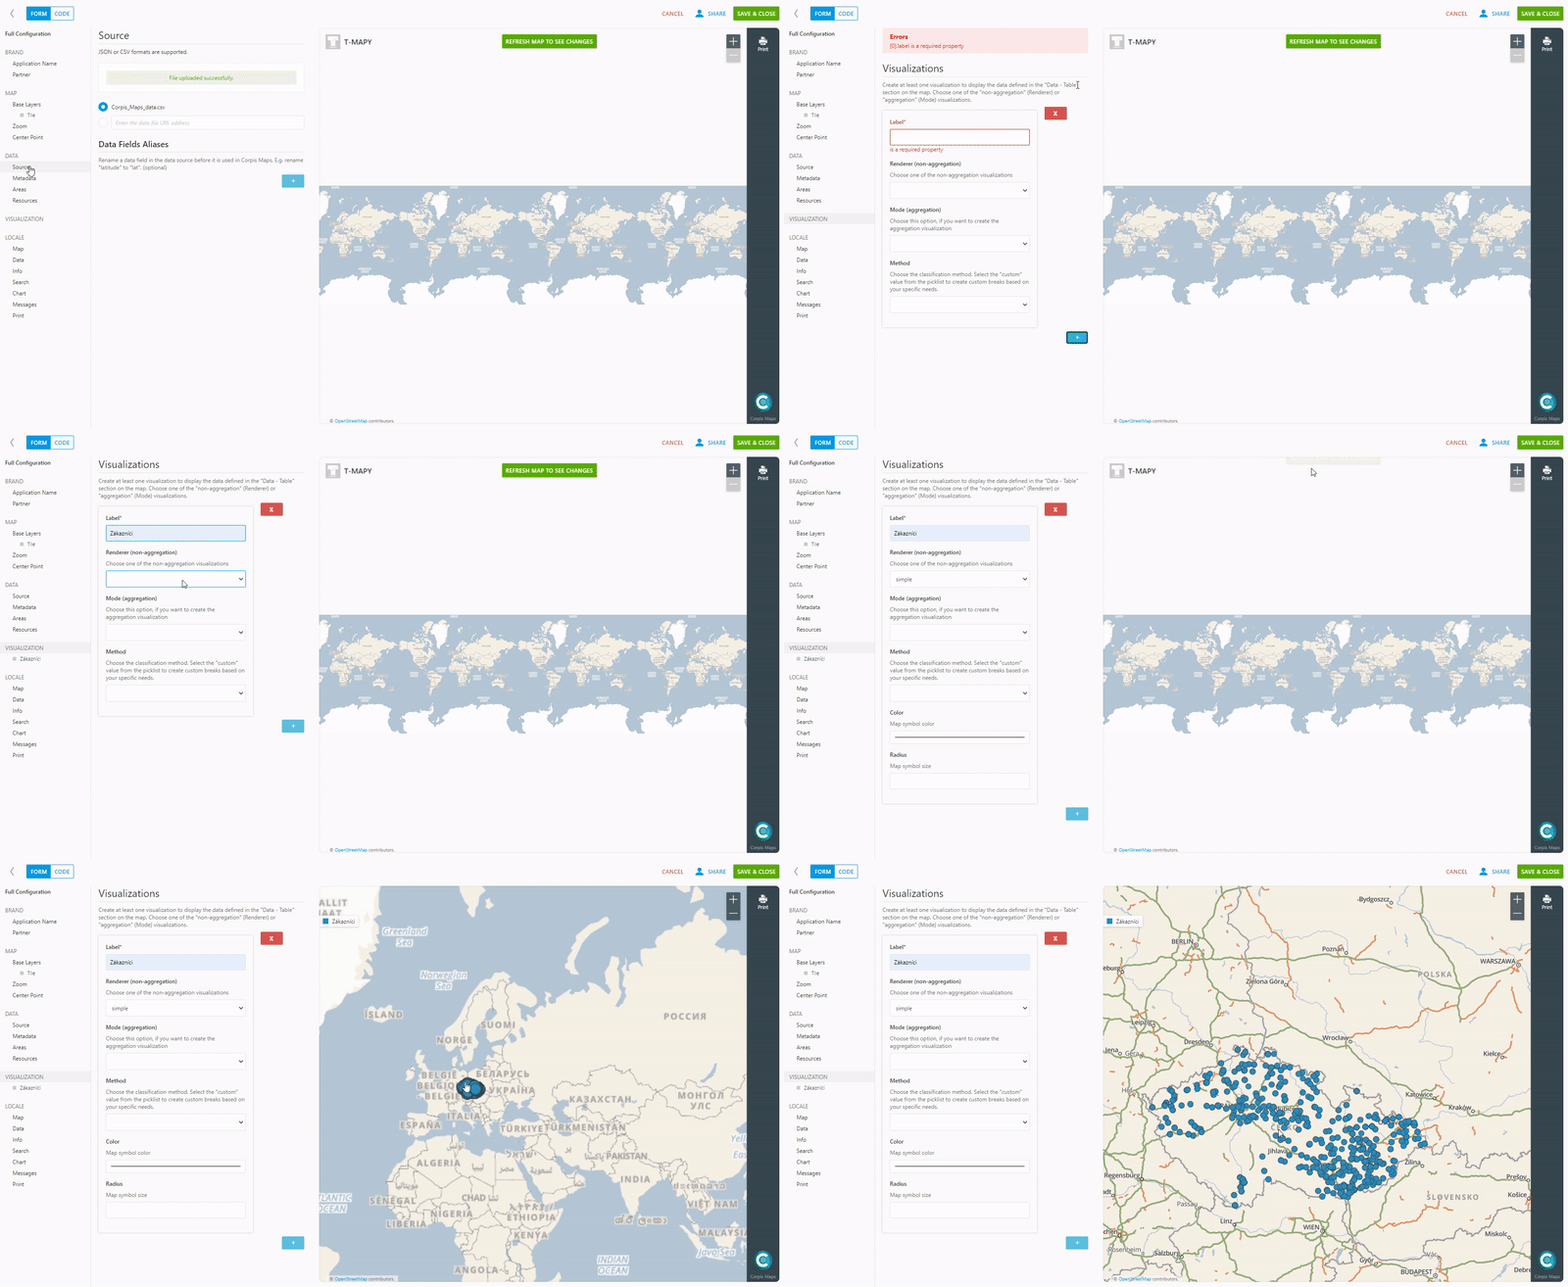
2. Data Visualization
Basic point visualization (simple), heatmap and clusters can be added in the “Visualization” section without any further modifications. Confirm all changes made by clicking on “Refresh map to see changes”. For other types of visualizations it is necessary to add fields to the section “Data – Metadata”. You can find more about the creation of individual visualizations in the articles on the blog in the section „Manuals and Product Feature“.

Are you interested in management maps Corpis Maps?
Contact us and try Corpis Maps for free.
